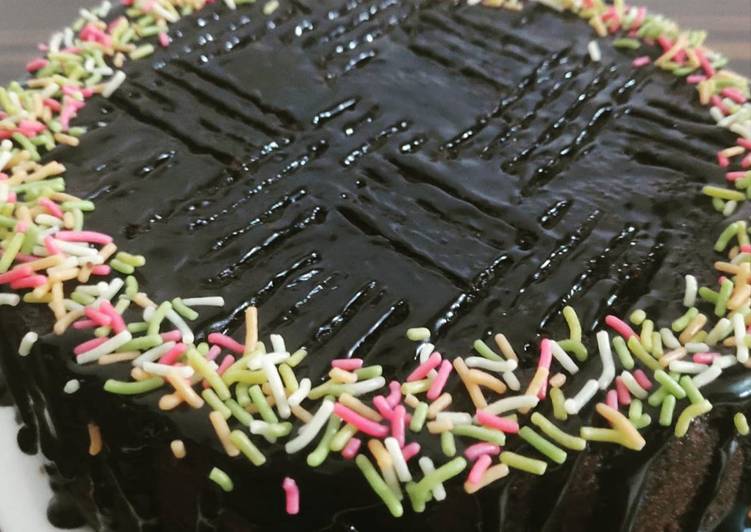
Hello everybody, I hope you are having an incredible day today. Today, I’m gonna show you how to prepare a special dish, chocolate decoration cake. It is one of my favorites food recipes. This time, I’m gonna make it a bit unique. This is gonna smell and look delicious.
Chocolate Decoration Cake is one of the most well liked of current trending foods on earth. It’s easy, it’s fast, it tastes delicious. It’s enjoyed by millions daily. Chocolate Decoration Cake is something that I have loved my entire life. They are fine and they look wonderful.
To begin with this particular recipe, we must first prepare a few ingredients. You can have chocolate decoration cake using 15 ingredients and 20 steps. Here is how you cook that.
The ingredients needed to make Chocolate Decoration Cake:
- Prepare cake Chocolate spongecake
- Get ★ Chocolate cream ingredients
- Take ★Heavy cream
- Get approx. 10 grams ★Sugar
- Get ★ Chocolate (half dark and half milk)
- Take ★Milk
- Prepare few drops Vanilla oil (or any liquor)
- Get ☆ Syrup ingredients
- Prepare to 1 1/2 tablespoons ☆Water
- Prepare to 1 1/2 tablespoons ☆Sugar
- Get to 1 1/2 tablespoons ☆ A liquor, like brandy or rum
- Take ■ Filling
- Make ready ■ Oreos
- Take ■ Banana
- Make ready or 5 ■ Candied chestnuts
Instructions to make Chocolate Decoration Cake:
- Cut the spongecake into 3 flat slices. I use a thin knife to draw lines around the perimeter of the cake to use as guidelines. If there's a better way, I want to know.
- Make the syrup by putting the ☆ ingredients into a heatproof bowl and microwaving it. Use a brush to thoroughly paint the surfaces of the spongecakes with the syrup. Use as much of the syrup as you like.
- Let's make the chocolate cream with the ingredients marked ★. Put the cut up chocolate, 2 tablespoons of heavy cream, and milk in a heatproof bowl and heat for 30 seconds at 600W.
- After you've taken the bowl out of the microwave, the chocolate may still look a bit solid, but it will melt nicely if you stir it. If it still doesn't melt, put it back in the microwave for a few more seconds.
- Combine the remaining cream, sugar and vanilla oil together and whip together until soft peaks form. Then add the ganache made in Step 4.
- As soon as you've added the ganache, beat together with a whisk. When slightly stiffer peaks form, the chocolate cream is finished.
- Place the first layer of sponge cake on a rotating table. Smooth the cake with the chocolate cream. I topped the cream with Oreos and finely minced candied chestnuts.
- If you crumble the Oreos a bit before adding to the cake, it will be easier to cut.
- Add more cream on top of your first filling and smooth out. After checking that the height is even, add the second layer of sponge cake. Cover with more cream.
- This time, once the cream was flat, I added sliced bananas and more candied chestnuts.
- Cover the topping with more cream just as before, and once its height is even and flat, add the third layer of spongecake. Scrape off any cream that may have been squeezed out of the sides.
- Including the cream you scraped off, cover the entire cake thinly with cream. This is just the crumb coat, so make it smooth so that it can be topped easily later.
- If the cream has too many air bubbles in it, fix it before you top the cake! Stir 1 to 1.5 tablespoons of milk into the cream to return the cream to a smooth texture.
- I read about this way to fix the cream in a cake decorating book. It said that you can fix dried out cream with milk. But don't make the cream more than 20% milk!
- Drop a generous amount of cream on the top of the cake and, while rotating the cake, hold a palette knife parallel to the top of it to smooth the cream flatly over the top of the cake.
- This time, hold the palette knife perpendicular to the cake and keep rotating the cake without stopping. While holding the palette knife still, rotate the cake slowly.
- After transferring the cake to a tray or plate, it's time to decorate.
- I finished the cake with a piping nozzle. I decorated it with grapes! It made for an autumnish cake. Though it's still not Obon (a summer festival for honoring ancestors in Japan), it's alright since the first day of fall (approximately August 8th) has passed.
- Though I couldn't eat the cake myself, my parents praised it for being very delicious. I'm very happy.
So that’s going to wrap it up for this special food chocolate decoration cake recipe. Thank you very much for your time. I’m confident that you can make this at home. There’s gonna be more interesting food at home recipes coming up. Remember to bookmark this page on your browser, and share it to your family, friends and colleague. Thanks again for reading. Go on get cooking!